
Song Demo
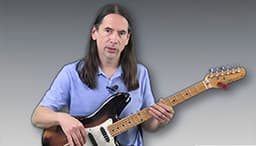
Introduction:
Smooth By Santana is a mix of rock, blues, and it combines some melodies of Latin rhythms as well. So if you are someone who is interested in learning the ways of Santana this should be a great starting point for your musical journey.
Fun Fact: In the beginning the song was called Room 17 and the idea of the song came to the mind of Itaal Shur, but then lyrics were all take out from the song and it was given to Rob Thomas, who completely re-wrote the song and changed its original melody, that’s how Smooth came into existence by Santana.
Chords Used in Song Guitar Lesson
Arpeggios Verse & Chorus Chords: The arpeggios for this song are as follows:
e|------1-------------|
B|----3---3----------|
G|--2-------2--------|
D|--------------------|
A|--------------------|
E|--------------------|
Strumming Pattern
There are two strumming patterns for this song, the first one is pretty basic and you can play it like this: DD UU DU.
- D = Down Strum
- U = Up Strum
Or you can play this version which adds more groove to the song: DD X UDU.
- D = Down Strum
- U = Up Strum
- X = Muted Strum
Song Structure
Introduction: In this introduction, Mike is going to show you how to tune up your guitar for this song.
Song Arrangement: Here, you will learn about the different guitar rhythms that you will be following as you play the song. Mike starts explaining every rhythm starting with the intro section.
Song Demo: Over here, Mike is going to show you how to play the guitar parts of the song with the backing track.
Solo 1: From this part, you will start learning how to play different solos which come in the song. This is the first solo performed by Santana in the first part of the song.
Overdub Licks: This particular section shows how to play a particular lick which is being played at the 32 second of the track.
Solo 2: This is the second solo from the song.
Solo 3: Solo which comes after the verses.
Outro Solo: This one is the last solo which Santana played and it was used as an outro for the song.
Why Learn Smooth By Santana?
Carlos Santana is known throughout the world for his amazing phrasing and his ability to sustain heavy tones on the guitar. As you learn this song, you will get to know about techniques like Vibrato, sustain, melodic soloing and smooth transition between the lead and the rhythm of the song.
FAQs-This Song Guitar Lesson
Q1. Who originally sang “Smooth?”
Ans. Smooth was performed by Santana & Rob Thomas who were part of a band called Matchbox Twenty. This song was released as a lead single from the 1999s studio album, Supernatural.
Q2. What made Santana so famous in the music industry?
Ans. Santana became much more popular after their incredible set which they performed live at Woodstock in 1969. In that same year, the band also released their self-entitled LP as well.
Q3. Is Santana considered to be a good guitarist of his time?
Ans. Santana is known to be the man who invented the Latin rock guitar genre, making it stand as one of the best of his generation.
Introduction:
Smooth By Santana is a mix of rock, blues, and it combines some melodies of Latin rhythms as well. So if you are someone who is interested in learning the ways of Santana this should be a great starting point for your musical journey.
Fun Fact: In the beginning the song was called Room 17 and the idea of the song came to the mind of Itaal Shur, but then lyrics were all take out from the song and it was given to Rob Thomas, who completely re-wrote the song and changed its original melody, that’s how Smooth came into existence by Santana.
Chords Used in Song Guitar Lesson
Arpeggios Verse & Chorus Chords: The arpeggios for this song are as follows:
e|------1-------------|
B|----3---3----------|
G|--2-------2--------|
D|--------------------|
A|--------------------|
E|--------------------|
Strumming Pattern
There are two strumming patterns for this song, the first one is pretty basic and you can play it like this: DD UU DU.
- D = Down Strum
- U = Up Strum
Or you can play this version which adds more groove to the song: DD X UDU.
- D = Down Strum
- U = Up Strum
- X = Muted Strum
Song Structure
Introduction: In this introduction, Mike is going to show you how to tune up your guitar for this song.
Song Arrangement: Here, you will learn about the different guitar rhythms that you will be following as you play the song. Mike starts explaining every rhythm starting with the intro section.
Song Demo: Over here, Mike is going to show you how to play the guitar parts of the song with the backing track.
Solo 1: From this part, you will start learning how to play different solos which come in the song. This is the first solo performed by Santana in the first part of the song.
Overdub Licks: This particular section shows how to play a particular lick which is being played at the 32 second of the track.
Solo 2: This is the second solo from the song.
Solo 3: Solo which comes after the verses.
Outro Solo: This one is the last solo which Santana played and it was used as an outro for the song.
Why Learn Smooth By Santana?
Carlos Santana is known throughout the world for his amazing phrasing and his ability to sustain heavy tones on the guitar. As you learn this song, you will get to know about techniques like Vibrato, sustain, melodic soloing and smooth transition between the lead and the rhythm of the song.
FAQs-This Song Guitar Lesson
Q1. Who originally sang “Smooth?”
Ans. Smooth was performed by Santana & Rob Thomas who were part of a band called Matchbox Twenty. This song was released as a lead single from the 1999s studio album, Supernatural.
Q2. What made Santana so famous in the music industry?
Ans. Santana became much more popular after their incredible set which they performed live at Woodstock in 1969. In that same year, the band also released their self-entitled LP as well.
Q3. Is Santana considered to be a good guitarist of his time?
Ans. Santana is known to be the man who invented the Latin rock guitar genre, making it stand as one of the best of his generation.
Explore More in English Songs


Introduction
Tune in to another detailed guitar lesson on the Torrins platform! The I Should Have Known Better guitar lesson is taught by our expert instructor Steve Luciano. He makes learning this popular Beatles song both fun and rewarding.
I Should Have Known Better, by The Beatles, was originally released on the soundtrack of A Hard Day's Night—the film of the same name.
This guitar tutorial covers chord progressions and rhythm in detail. Steve also breaks down the advanced rhythm of this song for those who wish to level up their guitar playing.
Fun Fact:
In A Hard Day’s Night, "I Should Have Known Better" is performed in a train’s brake coach—but the scene was actually filmed inside a stationary van, with crew members rocking it to simulate motion!
Chords & Key
Steve Luciano demonstrates how to play this song in the key of G major, using only seven chords. Some of the key chords in this song are G, C, Em, and D7. Tune in to the full guitar tutorial to learn the remaining chords and master the song with us.
Chords Used in I Should Have Known Better Guitar Lesson
Verse & Chorus Chords: This song primarily includes open chords.
Strumming & Rhythm
Basic Rhythm Pattern: DDDUD (4 beats)
- The strumming pattern follows a 4-beat rhythm, making it beginner-friendly
- Steve Luciano demonstrates how to navigate chord transitions, including the shift from two chords per measure in the intro and beginning of the verse to one chord per measure throughout the rest of the song.
Right-Hand & Left-Hand Technique
- Since the rhythm remains consistent throughout, the right hand moves constantly, focusing on steady strumming.
- The left-hand placement changes, and Luciano shares great tips on finger positioning and switching, ensuring smooth playing.
Song Structure
This song follows the usual verse-chorus format.
Use the provided tabs to follow the chord progressions as Luciano guides you through the song structure.
Advanced Rhythm Techniques
Once you've learned the basic chords and developed good control over your left hand, you can move on to a more complex rhythm pattern.
Anticipated Rhythm:
- Luciano introduces a technique where chords or notes are played slightly before the expected beat to create a sense of forward motion and groove.
- This anticipation technique adds energy, syncopation, and a more natural feel to the rhythm, making your playing sound more dynamic.
Why Learn I Should Have Known Better Song?
Learning this Beatles classic will help you build core guitar skills in a fun and engaging way.
Whether you're a beginner or looking to brush up on technique, this track offers plenty of learning opportunities.
This guitar lesson focuses on:
- Learning various chords
- Understanding rhythm variations & dynamics
- Improving strumming and finger placement
FAQs – I Should Have Known Better Guitar Lesson
Q1: Do I need a capo?
No, a capo is not required. However, you can try experimenting with different voicings to see what matches your vocal range.
Q2: Are there any barre chords in this song?
No, Steve Luciano teaches this song using open chords only.
Q3: How can I make the rhythm more dynamic?
Playing chords slightly ahead of the beat creates a more dynamic feel. This anticipation technique is covered in detail in the guitar lesson.

Introduction
Tune into a classic Pink Floyd guitar lesson on Wish You Were Here at Torrins.com, led by our experienced tutor, Mike Dugan. He breaks down the lesson into various sections: Introduction, Intro Chords & Rhythm, Intro Lead, Verse & Chorus Lesson, Solo Improvisation, Arrangement & Playing with Backing Track.
Interesting Fact: In the song's intro, you can hear David Gilmour coughing and breathing heavily before the guitar kicks in. Rumour had it that Gilmour’s smoking habit caused the cough, and that he quit smoking afterwards out of frustration with the recording. But Gilmour later clarified he never smoked!
Mike plays the song using various open chords, including Em, Em7, G, A, and Am. Tune into the complete lesson to learn the rest of the chords that make up this song. This song is a great choice for both beginners and intermediate players.
Chords Used in "Wish You Were Here" Guitar Lesson
This song is played using simple open chords, making it accessible for both beginners and intermediate players. For intermediate players, Mike introduces some alternate chord voicings to stay true to the song’s original sound while adding a unique touch.
Strumming Pattern
The strumming pattern is beginner-friendly with consistent downstrums. For those wanting to level up, Mike shares an advanced rhythm that incorporates upstrums for a more dynamic feel.
Song Structure
"Wish You Were Here" follows a clear and structured arrangement:
- Intro: Lead + rhythm section (Mike provides a simpler alternative for beginners)
- Lead Riffs: Based on the E minor pentatonic scale and its extensions, featuring double stops and hammer-ons.
- Verse 1: Smooth chord transitions; beginners can use downstrums, while advanced players can follow the more complex rhythm.
- Solo: You can either repeat the intro solo or follow Mike’s improvisation using the E minor pentatonic scale.
- Verse 2: Similar to Verse 1, with consistent strumming and clean transitions.
- Final Solo: A concluding solo based on the intro lead and E minor pentatonic improvisation.
Improvisation Techniques
Mike teaches how to improvise using the E minor pentatonic scale. He also adds his own flair by playing it on the 12th fret in true David Gilmour style.
Singing Along
Mike also walks you through the singing component, helping you match the chord changes with the lyrics.
Pro Tip: Make use of tabs and lyrics for smoother learning.
Why Learn "Wish You Were Here"?
This lesson helps you improve your chord transitions and develop a smooth, expressive playing style. It's a great piece to master for solo and sing-along sessions. Plus, learning David Gilmour’s style will sharpen your improvisation skills.
Tips to Improve:
- Focus on clean chord transitions.
- Keep your strumming hand relaxed to maintain a steady rhythm.
FAQs – "Wish You Were Here" Guitar Lesson
Q1. Is this song beginner-friendly?
Yes! The chords are straightforward, and Mike provides a simplified version of the intro for beginners.
Q2. Can I just strum the song instead of fingerpicking?
Yes! You can simplify the song with consistent downstrums or follow the more advanced strumming pattern Mike shares.


Introduction:
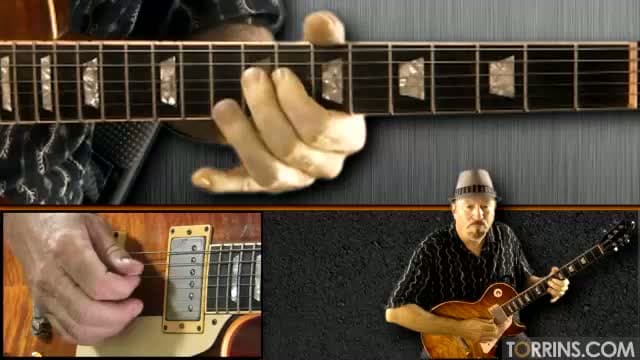
Torrins brings you an exciting lesson on The Thrill Is Gone, the legendary blues song made famous by B.B. King. Taught by Mike Dugan, this lesson is perfect for those looking to master both rhythm and lead guitar in a blues setting. You'll learn everything from chords and rhythm to soulful lead fills and solo techniques.
Fun Fact: While most people associate "The Thrill Is Gone" with B.B. King, the song was originally written and recorded by Roy Hawkins and Rick Darnell. However, B.B. King’s version became a massive hit, earning him a Grammy Award for Best Male R&B Vocal Performance in 1970 and a spot in the Grammy Hall of Fame in 1998.
Chords & Rhythm
This lesson starts by breaking down the essential chords used in the song. The song is in the key of B minor, incorporating barre chords like Em, F#7, and others in a 12-bar blues progression. Mike explains the finger placements for each chord, ensuring clarity for both beginners and advanced players.
The rhythm follows a straightforward 4-feel, meaning it doesn’t use shuffle or swing. Mike provides an easy method to simplify the rhythm, explaining the accents and muting techniques that bring the groove to life.
Sing and Play Technique
One of the key elements of this song is matching vocals with guitar playing. The song follows a typical blues structure where the first line is repeated, making it essential to synchronize your playing with the melody. Mike shares helpful tips on keeping time and smoothly integrating vocals with guitar.
Solo & Lead Fills
Next, we dive into the iconic solo heard in the introduction. The solo is based on the B minor pentatonic scale, and Mike walks through each lick, ensuring you understand the phrasing and feel that make B.B. King’s style so expressive.
Following the solo lesson, the instructor covers lead fills, which are played in between vocal phrases. He sticks to the B minor pentatonic scale, showing how to create emotional lead parts.
Song Demo & Final Arrangement
The lesson concludes with a full song demo, allowing you to hear all the elements come together. The final arrangement follows the classic 12-bar blues progression, with a structure of intro, two verses, solo, two verses, and outro. Mike plays along with the backing track, reinforcing everything covered in the lesson.
Why Learn "The Thrill Is Gone"?
- Great way to practice 12-bar blues progressions.
- Helps improve lead guitar phrasing and soloing.
- Perfect for learning how to sing and play simultaneously.
FAQs -The Thrill Is Gone Guitar Lesson
Q1. Is this song beginner-friendly?
Yes! While some barre chords are involved, Mike provides tips to make them easier.
Q2. Do I need a capo for this lesson?
No capo is required!
Q3. What’s the best way to practice lead fills?
Start slow and break the fills into smaller sections. Play along with the backing track to develop feel and timing.

Similar Rock Songs
Introduction:
Torrins brings you one of the most legendary rock riffs ever recorded-Smoke on the Water by Deep Purple, taught by Mike Walker. This guitar lesson is designed to break down the song step by step, covering everything from the iconic riff to solo improvisation. Whether you’re picking up the electric guitar for the first time or looking to level up your playing, this one’s a must-learn.
Fun Fact: Although the song appeared on Machine Head in 1972, it wasn’t released as a single until 1973. Surprisingly, the band didn’t expect it to be a hit. But it climbed to number 4 on the Billboard pop charts and became one of the most recognizable riffs in rock history.
Chords and Song Key
This lesson is taught in the key of B♭, but the song carries a G minor feel throughout. You’ll be using a few essential power chords like G5, A♭5, and others as you move through the sections.
The song’s time signature is 4/4, with a tempo of 112 BPM. Two main scales are used across the lesson: the G minor scale and the G blues pentatonic, both of which are central to the solo and improvisation parts.
Iconic Intro Riff
It’s the riff that every guitarist wants to play and for good reason. Mike breaks it down clearly, explaining which strings to let ring and how to get that gritty rock tone. He demonstrates both fingerpicking and pick-style playing, so you can choose the approach that suits you best.
Verse and Chorus Sections
In the verse, you’ll be working with a group of three chords, using arpeggios and palm muting to add texture. The phrasing follows a clean 4-bar structure, making it easy to follow.
The chorus section also relies on arpeggios. Mike walks through each measure in detail, grouping chords and explaining the rhythm so you can play with ease and confidence.
Rhythm Underneath the Solo
For the rhythm guitar players, Mike breaks down the part that supports the solo section. This part mostly uses just two chords, but involves some precise fingerpicking techniques to maintain the groove and drive.
Solo Lesson
Mike takes you through the solo lick by lick, staying in the G minor scale. He explores techniques like vibrato to add feel and energy. It’s a great way to learn how to play expressively.
Solo Demo and Improvisation
Once the solo is broken down, Mike ties everything together with a full solo demo played along with a backing track. Then comes the fun part, improvisation. He shares how to use:
- G minor and G pentatonic scales
- G pentatonic with a flat 5
- Phrasing on the 15th fret
You’ll also pick up a few stylistic ideas inspired by Jon Lord’s playing style, which adds a cool, classic-rock flavor to your soloing.
Why Learn - Smoke on the Water?
- One of the most famous riffs in rock history
- Teaches you both rhythm and lead techniques
- A solid introduction to rock improvisation
- Perfect for building confidence on the electric guitar
FAQs – Smoke on the Water Guitar Lesson
Q1. Is this song beginner-friendly?
Yes, and Mike simplifies each section so it’s approachable even if you’re just getting started.
Q2. Do I need an electric guitar?
It’s recommended, as this song is designed with electric tone and expression in mind.
Q3. Can I play the riff with a pick?
Absolutely. Mike shows both finger and pick methods—you can choose what feels right.

Introduction
Tune into Torrins’ guitar song lesson on the iconic single by American rock band Guns N' Roses, Sweet Child O’ Mine. This chart-topping hard rock song is taught by our instructor, Mike Walker. He has broken down the lesson into 10 parts for a detailed understanding of each section and to make learning easier. Find dedicated lessons on the intro, verses, choruses, interlude solos, main solo, and outro.
Fun Fact: "Sweet Child O' Mine" was born out of a playful jam session at the band’s house. Slash was fooling around with a "circus" melody to make drummer Steven Adler laugh when Izzy Stradlin suggested turning it into a song. Within an hour, the band had crafted the core structure, and Axl Rose, inspired by his girlfriend Erin Everly, wrote the heartfelt lyrics by the following afternoon.
Chords Used in Sweet Child O' Mine Guitar Lesson
This song is played in half-step down tuning and features a mix of open chords and power chords. Some of the key chords used in the song include:
- C, D, Cadd9
- A power chord, Dsus4
Tune into the full lesson to learn all the chords and how to transition between them seamlessly.
Strumming Pattern
- Intermediate/advanced rhythm: Alternating strumming pattern with pull-off techniques for added depth
- A lick is layered over the chorus, and Mike walks you through how to blend it into the song smoothly
Song Structure
This song follows a well-defined verse-chorus format:
- Intro Riff – The iconic opening lick is based on a repetitive motion with just the first note changing. It’s repeated twice.
- Verse 1 & 2 – Follows an 8-bar phrase played twice using three chords. Incorporates a pull-off pattern. Mike breaks down the intricacies of the verses in great detail.
- Chorus – Mix of power chords and open chords like A power chord, C5, and Dsus4. A lick is played over the chorus for added texture.
- Solo 1 – The rhythm underneath the solo is half the length of the verse.
- Verse 2 – Similar to Verse 1.
- Chorus 2 – Same as Chorus 1.
- Solo 2 – A longer solo covering an entire verse.
- Chorus 3 – Double the length of the previous choruses.
- Outro Solo – Includes wah-wah pedal, hammer-ons, pull-offs, sliding, and some resting measures for dynamic effect.
Why Learn Sweet Child O' Mine?
This lesson covers not just the guitar parts but also the feel and dynamics that make the song iconic.
- Learn the nuances of Slash’s soloing style
- Improve your pull-offs and hammer-ons
- Master playing with a wah-wah pedal for expressive control
FAQs – Sweet Child O' Mine Guitar Lesson
Q1. Is this song beginner-friendly?
Ans: This lesson is ideal for intermediate and advanced players.
Q2. What’s the trick to mastering the intro riff?
Ans: Focus on the repetitive pattern and ensure the other strings are muted for a clean sound.


Introduction
Join our expert instructor, Bobby Koeble, for an in-depth lesson on "Always With Me, Always With You" by Joe Satriani. This song is a lyrical masterpiece known for its challenging legato-style licks and smooth melodic phrasing. This intermediate to advanced-level lesson will walk you through every section of the song, helping you master both the technical and emotional elements that make it so iconic.
Interesting fact: Joe Satriani wrote "Always With Me, Always With You" as a heartfelt tribute to his wife. Unlike many of his other complex, high-energy tracks, this song stands out for its melodic simplicity and emotional depth. Satriani has said that the song represents a peaceful and constant connection with his wife, capturing the feeling of always being together no matter the distance.
Bobby has broken down the song lesson into various sections for a detailed understanding.
- Introduction
- Separate lessons for Solo section 1-6
- Conclusion and backing track
Chords Used
This song is in the key of B major and follows a 3/4 time signature. Some of the key chords used are:
- B11 – Uses the E string for added depth.
- E major – Bobby teaches a unique fingering that differs from standard chord shapes.
- G# minor and F#sus4 – Essential for the song’s harmonic feel.
Tune into the song lesson to learn the rest of the chords that make up this song.
Strumming Pattern
The rhythm of this song is signature to the tune. It follows a strict 8-note rhythm with incorporated techniques such as:
- Palm muting
- Arpeggios
- Sliding
Bobby also shares alternative ways to approach the rhythm so you can find what works best for you.
Song Structure
This song features a flowing, solo-driven structure:
Intro: It has a lyrical melody featuring legato-style licks
Solo Section 1: It is played in the key of B major and incorporates harmonics, vibrato, and sliding.
Solo Section 2: Moves higher up the neck and incorporates heavy use of vibrato and smooth phrasing.
Solo Section 3: This section has a harmony and melody change and is slightly longer and more complex. It introduces left-hand legato techniques.
Solo Section 4: Main melody moves up an octave and incorporates two-handed tapping.
Solo Section 5: It is the most rhythmically challenging part that includes double stops and varied phrasing.
Solo Section 6: Returns to the earlier melody with subtle variations in slide and inflexion. It has a fast legato-based lick to close out.
Outro: Bobby wraps up the lesson by playing along with the backing track
Why Learn This Song?
- Master left-hand legato techniques
- Develop precise control over sliding and vibrato
- Incorporate bluesy elements into your playing
- Build confidence with soloing and tapping
FAQs- Always With Me, Always With You Song Guitar Lesson
Q1. Is this song suitable for beginners?
No, this lesson is best for intermediate to advanced players due to the complex legato and tapping techniques.
Q2. How can I improve my sliding and vibrato?
Focus on timing and pressure consistency. Bobby shares detailed tips on mastering both.